Let’s face it, generic websites simply won’t cut it anymore. To stand out from the competition, and captivate your audience, you need to personalize your website content. By implementing an effective website personalization strategy, you can create a user-centric experience that drives engagement. But, it can be tricky to know how to start personalizing your website content. That’s exactly why we have put together this step-by-step guide to help you personalize your website content and drive conversions.
Introduction to B2B Website Personalization
B2B website personalization is a relatively new technology. However, we’ve seen B2C website personalization from popular shopping platforms like Amazon for years. Essentially, website personalization refers to the process of customizing your website based on user behavior, in our case firmographic qualities. By showing your website visitors a custom view of your website, you can increase engagement, boost conversion rates, and improve customer loyalty. After all, a company with 10 employees doesn’t have the same needs as a company with 1,000+ employees. If you want to learn more about website personalization, check out our blog article What is Website Personalization?
Mapping the User Journey
Before you begin personalizing your website, you’ll need to understand your user journey. This means identifying key touchpoints for personalization opportunities. As an example, if you are using Google Ads to attract website visitors, and you have a testimonial near the top of the page, you could swap out that testimonial based on the visitor’s location, company size, job title, and other factors. This ensures that your website visitors are only seeing content that suits their needs, so they don’t have to go searching for it.
Segmentation is Key
Segmenting your website visitors is how you will get the highest quality results. And, ultimately the most conversions. An example of this could be selecting multiple different testimonials for your Google Ads landing page, so your visitor will get the version that most resonate with their needs. You could have a case study for each of the main industries that you work with, showcasing how you have helped their specific needs. In turn, your website visitors will be more likely to relate to the company you featured in the testimonial. And, more likely to convert!
Leverage Data
Just like any other form of marketing, you’ll need to leverage data in order to make data-driven decisions. After your personalizations have been running for a while, it’s a good idea to see if there are any updates that can be made. If you’re not sure where to get started, it can also be helpful to test out various A/B testing strategies. In this case, you can compare similar, but slightly changed versions of your landing page. You might be surprised at how small changes can make a big difference!
Utilizing Visitor Queue for Website Personalization
Now that you know some of the concepts that go into personalizing your website content, you may be wondering how to get started. With the help of a website personalization software, like Visitor Queue, you can personalize your website in minutes. And, best of all, we are a no-code tool, so you can do everything yourself! Here is a step-by-step guide to show you how easy it is to personalize your own website and increase conversions!
Personalizing Your Website in Just a Few Steps…
Once you create or log into your Visitor Queue account, click “Personalize” on the left-hand side of your screen.
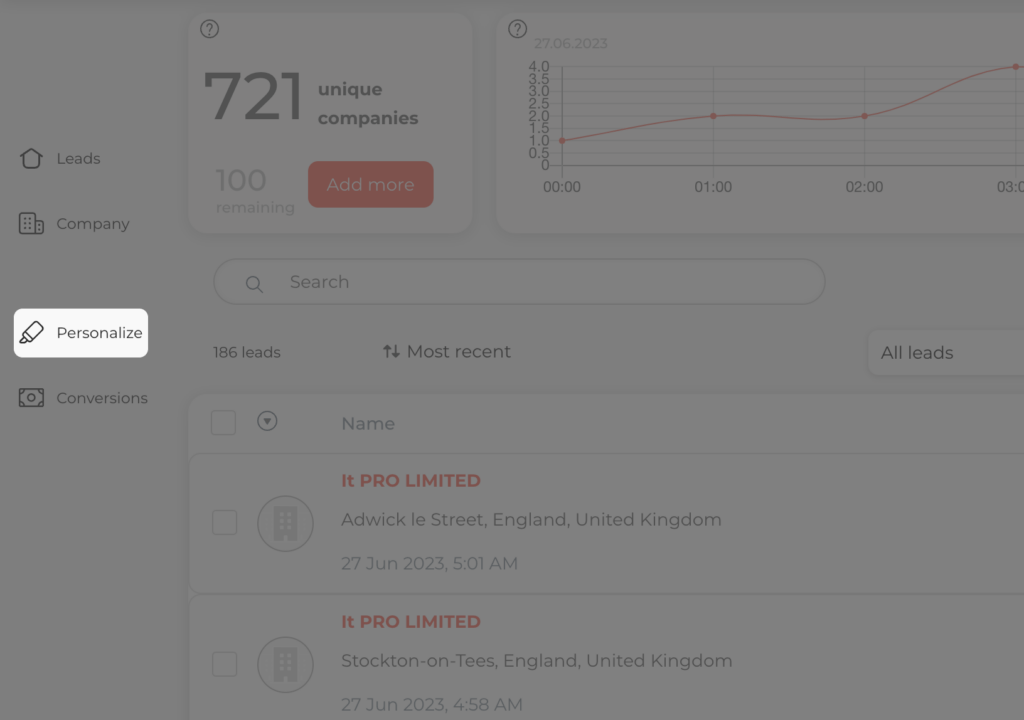
Next, Click “New Personalization”. Here is where you’ll name your personalization. Since you can add multiple websites to your Visitor Queue account, you’ll also need to select which website you want to create the personalization on.
Once you have selected the website that you want to create the personalization on, it’s time to choose the page that you want to personalize. When you enter in the new page, remember to include the “https://” in the URL!
Once you have selected the page, it’s time to define your audience. There are a number of different ways that you can define your personalization criteria. Just to name a few, you can sort by industry, company size, location, or acquisition. The example below shows “Industry Equals Construction”. So, companies that visit your website that are in the construction industry will see this personalization. Click “Save” before we move on to actually building the personalization.
Now, we get to the exciting part of personalizing your website content! We are now at building your website personalization and customizing your landing page. Simply click on the object that you would like to edit, and enter in the new text, images, links, or other attributes that you want your audience to see. When you are in the Page Editor Tool, you can undo, redo, and delete previous changes. Once you are happy with your changes, click “Save”.
Back on your personalization dashboard, click “Publish”. And, just like that, your website personalization is published! It really is that easy to personalize your website.
WYSIWYG Editors
What you see is what you get, or WYSIWYG for short, is a type of website editor that allows you to build content by dragging and dropping blocks. We see this type of content builder more and more often since it is much more user-friendly to use. This essentially means that you don’t need a developer to make changes to your website. Luckily, Visitor Queue’s website personalization feature utilizes a WYSISYG editor, making it easy for marketers like yourself to personalize your website content.
What’s Next?
It takes an average of 8 touchpoints before a prospect converts. Knowing this, personalization may not be enough to truly entice your visitors into converting. So, it’s essential to pair your website personalization with a strong social media presence. By leveraging social proof, your prospects are more likely to trust your company, and see the value that you’d bring to their company. It can also be helpful to use remarketing to target your previous website visitors, and drive them to a personalized landing page. By pairing multiple marketing tactics, your prospects can be more likely to convert into paying customers.
Final Words
As you can see, personalizing your website content doesn’t have to be difficult. And, best of all, it doesn’t have to include any code. Personalizing your website content can be a fantastic way to increase your website conversion rate, and close more deals! By showing a tailored view of your landing pages, your visitors can see exactly what they want to see, so they don’t have to go searching around your website. If you have any questions about personalizing your website content, don’t hesitate to contact us.
 Identify
 Personalize
 Benchmark
 Agencies
 Integrations
 Case Studies
 Use Cases
 Blog
Blog Resources